How to Clean Dogs Ears Naturally: Safe Ear Care Solutions That Work
Those moments when your dog leans against you are special. It is a bond built on trust and gentle touch. Seeing your pet shake their head or scratch worries you. You just want them to be comfortable and happy.
Keeping your pet clean needs a gentle, observant approach. Healthy ears usually don’t need much cleaning. But, regular checks help catch any problems early. Always prioritize safety by avoiding harsh homemade mixtures that might cause irritation.
If you see redness, strong smells, or signs of pain, see a vet first. They can help you fix any issues right away. By being calm and consistent, you keep your pet comfortable and their hearing sharp.
Table of Contents
Why Regular Ear Care Matters for Dogs
Proper ear care for dogs is more than grooming. It’s a health must. Your dog needs you to watch their health, and ears show problems first. Early action can stop small issues from becoming big infections.
How Ear Wax, Moisture, and Debris Affect Your Dog’s Ears
Dogs have L-shaped ear canals that trap moisture and debris. Wax buildup creates a warm, dark spot for bacteria and yeast. This leads to bad smells and irritation for your pet.
Activities like running in tall grass or swimming can put things in your dog’s ears. Without air, these things can cause swelling. Regular checks help keep your dog comfy and irritation-free.
Which Dogs Need More Frequent Ear Checks
Not all dogs need the same ear care. Some breeds and lifestyles make some dogs more likely to have ear problems. Pay extra attention if your dog is in these groups.
| Dog Characteristic | Risk Level | Maintenance Frequency |
|---|---|---|
| Floppy Ears | High | Weekly |
| Heavy Ear Hair | Moderate | Bi-weekly |
| Frequent Swimmers | High | After every swim |
| Allergy Prone | High | As needed |
How Cleaning Supports Healthy Ear Care for Dogs
Regular checks and gentle cleaning are key for ear care for dogs. Cleaning gets rid of surface dirt and wax, but it’s not everything. You can’t stop every infection with just cleaning.
If you see redness, discharge, or a bad smell, see a vet. The right cleaning helps, but always put your dog’s safety first. Good ear care is about watching closely and knowing when to get help.
When to Clean at Home and When to Call Your Veterinarian
Not every ear issue needs a vet visit, but knowing the signs is key for safe ear cleaning for dogs. It’s important to know when to clean at home and when to seek vet help. This helps keep your pet comfortable and safe.
Signs of Normal Ear Wax and Minor Surface Debris
A healthy dog’s ears should look clean and smell neutral. You might see a bit of light-colored wax near the ear opening.
This is normal and can be handled with gentle care. If the wax is light and your dog is not showing signs of irritation, it’s just debris. You don’t need to see a vet for this.
Warning Signs of Infection, Mites, Allergies, or Injury
Big changes in ear appearance or smell mean it’s time to stop home care. These signs often point to a serious issue that needs a vet’s check.
Redness, Swelling, Odor, Discharge, and Persistent Scratching
Dark, crusty discharge or a strong smell means infection or mites. Persistent scratching or rubbing against furniture shows your dog is in pain.
Head Tilting, Balance Problems, and Signs of Pain
Head tilting or balance issues are serious. They often mean an inner ear problem that needs vet help right away.
“The ear canal is a delicate environment; when it becomes inflamed, even the most well-intentioned cleaning can cause significant pain and damage to the eardrum.”
Why You Should Not Clean Painful or Severely Inflamed Ears Without Veterinary Advice
Trying to clean an inflamed ear can do more harm. If your dog flinches or whines, it’s too sensitive for home care.
Cleaning an infected ear can push bacteria deeper or irritate raw skin. Always talk to your vet to use the right treatment.
| Feature | Healthy Ear | Infected Ear |
|---|---|---|
| Odor | None or mild | Strong, yeasty, or foul |
| Discharge | Minimal, light wax | Dark, thick, or pus-like |
| Behavior | Calm | Scratching, head shaking |
| Appearance | Pink, clean skin | Red, swollen, inflamed |
How to Clean Dog Ears Safely With Natural, Gentle Solutions
Keeping your pet’s ears clean is crucial. These steps for cleaning dog ears will help you do it safely. A gentle approach keeps your dog comfortable and cooperative.
Step 1: Choose a Calm, Comfortable Place
Find a quiet spot in your home where your dog feels safe. Bathrooms or laundry rooms are good because they’re easy to clean if your dog shakes off solution.
Step 2: Gather the Right Ear-Cleaning Supplies
Have everything ready before you start. This makes dog ear cleaning techniques more effective. Keep your supplies close to avoid keeping your dog still for too long.
Soft Cotton Pads, Gauze, Towels, and Treats
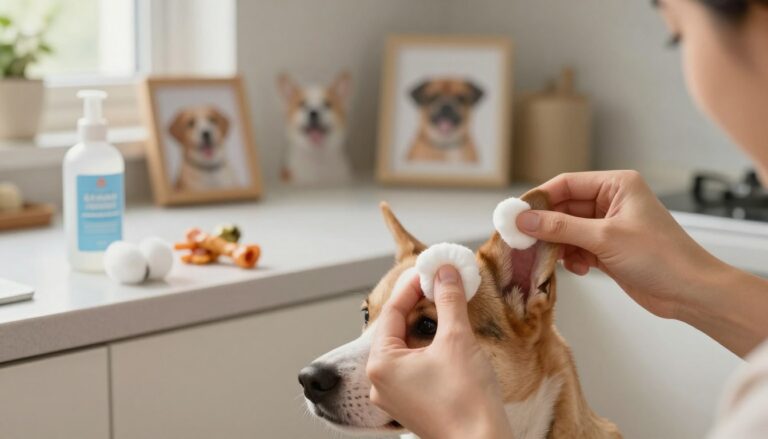
Use soft cotton pads or gauze to clean the ears. Avoid paper towels because they’re too rough. Keep treats ready to reward your dog for their patience.
Veterinarian-Approved Ear-Cleaning Solutions
Only use solutions your vet recommends. These are safe for your dog’s sensitive ear canal.
Step 3: Inspect the Outer Ear Before Applying Any Solution
Check the ear for redness, swelling, or a strong smell before cleaning. If it looks healthy, you can clean it.
Step 4: Apply the Cleaner Without Forcing It Into the Ear Canal
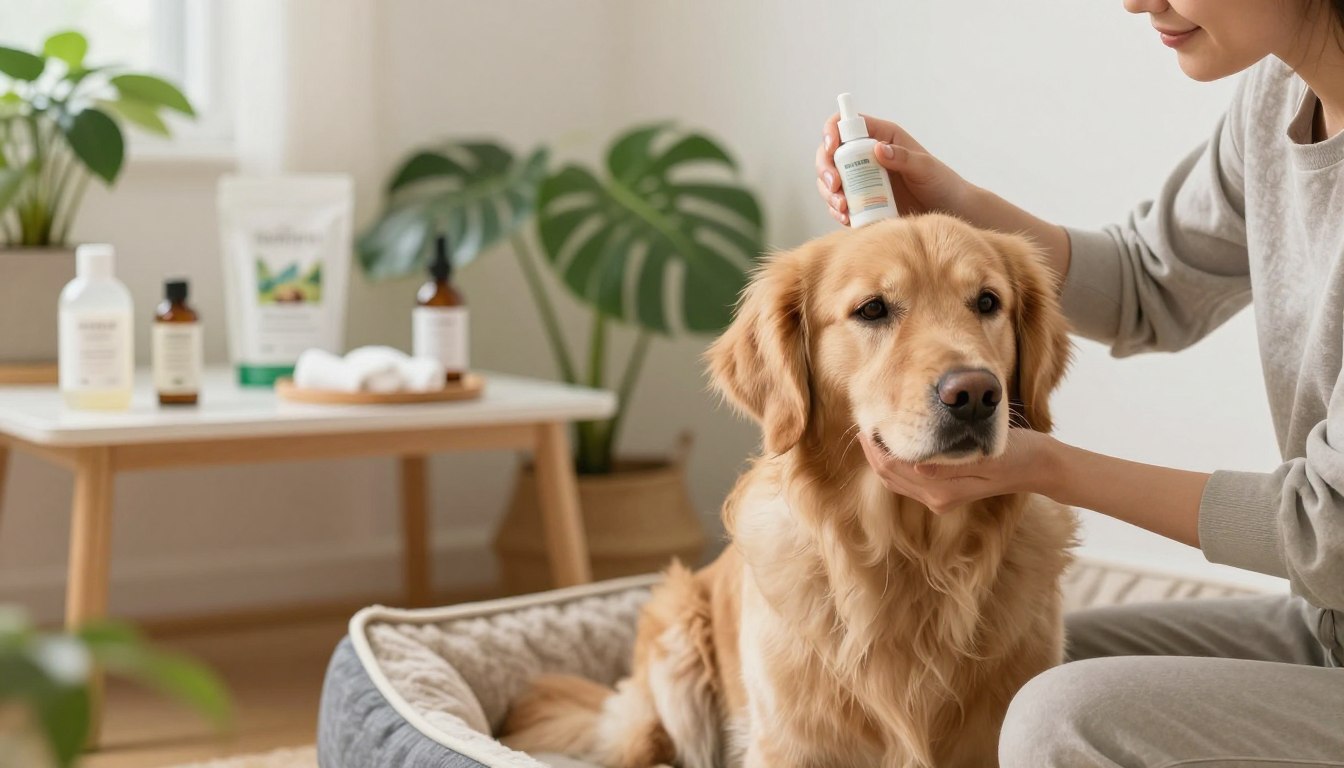
When cleaning, don’t put the bottle tip deep into the ear. Squeeze the solution gently into the ear canal opening.
Step 5: Massage the Ear Base to Loosen Debris
Massage the ear base in a circular motion with your fingers. You’ll hear a squishing sound, which means the solution is working.
Step 6: Let Your Dog Shake and Wipe Away Released Debris
Let your dog shake their head to bring out the debris. Then, use gauze to wipe away what you see.
“The goal of ear cleaning is to maintain hygiene without causing trauma to the delicate structures of the ear canal.”
Step 7: Reward Your Dog and Keep the Ears Dry
After cleaning, give your dog a treat and lots of praise. Make sure the outer ear is dry to prevent bacterial growth.
| Step | Action | Goal |
|---|---|---|
| Preparation | Gather supplies | Minimize stress |
| Application | Add solution | Loosen wax |
| Massage | Rub ear base | Break down debris |
| Completion | Wipe and dry | Prevent infection |
How to Clean Dog Ears Without Irritating Sensitive Skin
Keeping your dog’s ears clean is all about being patient and knowing their body. Every dog is different, and understanding these differences helps avoid discomfort or irritation. This is key to safe ear cleaning for dogs.
Use a Gentle Technique for Floppy, Hairy, or Narrow Ear Canals
Dogs with floppy ears, like Spaniels or Bassets, can get moisture trapped. This can lead to infections. If your dog has narrow ears or a lot of hair, clean slowly to avoid pain.
Heavy hair can hide problems, making it hard to see what needs cleaning. Always take your time to gently move hair aside. This lets you see the area before cleaning.
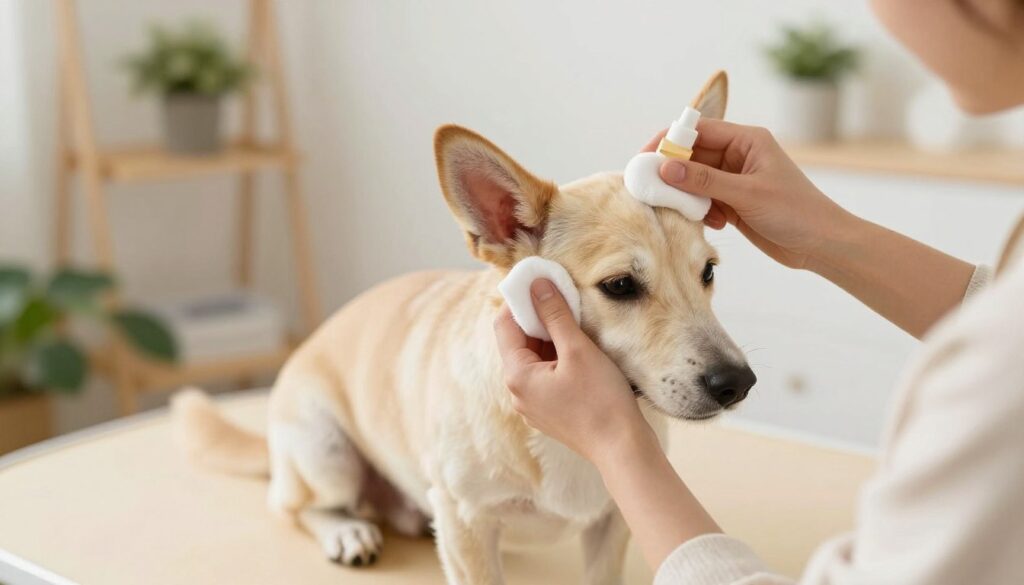
Keep Cotton Swabs Away From the Deep Ear Canal
Never put cotton swabs or hard objects deep in your dog’s ear. They can push wax and debris further, causing pain or damage. This is a big risk.
If you need to use a cotton ball, use it only for the outer ear. Safety is your top priority. Avoid tools that could hurt the inner ear.
Clean Only What You Can See and Reach Safely
For safe ear cleaning, focus on what you can see. Don’t try to clean what you can’t see. This keeps the cleaning safe and effective.
Stick to the outer ear flap and the canal entrance. This way, you avoid irritation and make the process easier for both you and your dog.
Adjust Handling for Nervous, Reactive, or Pain-Sensitive Dogs
Some dogs get anxious or reactive when their ears are touched. If your dog is sensitive, adjust how you handle them. This keeps them calm and cooperative.
Using Short Sessions and High-Value Rewards
Break the cleaning into short sessions to avoid overwhelming your dog. Use high-value treats to make the experience positive.
Stopping Immediately When Your Dog Shows Distress
If your dog pulls away, whines, or shows fear, stop right away. Forcing a cleaning when they’re stressed can cause long-term issues and make them more sensitive.
Prevent Water and Shampoo From Remaining in the Ears
Moisture can cause infections and irritation. During baths, use cotton balls to keep water and shampoo out of the ear canal. This helps prevent problems.
After bathing, dry the outer ear with a soft towel. This ensures no liquid is trapped. Keeping the ears dry is crucial for their health and comfort.
Natural Ear-Cleaning Solutions and Ingredients to Avoid
Finding the best dog ear cleaning products means knowing what to look for. Many think any liquid can clean a dog’s ear. But, using the wrong stuff can hurt your dog’s ears a lot.
What Makes a Dog Ear Cleaner Safe and Effective
A good ear cleaner balances your dog’s ear canal pH. It has ingredients that break down wax without hurting the skin. Always follow the bottle’s clear directions to use it right.
Why Plain Water Is Not Always Enough for Ear Wax
Water might seem safe, but it can’t get rid of ear wax well. It lacks the needed surfactants to dissolve wax. Also, moisture in the ear can lead to bacteria and yeast growth.
Risks of Vinegar, Hydrogen Peroxide, Alcohol, and Essential Oils
Stay away from vinegar, hydrogen peroxide, and rubbing alcohol. They can sting or burn your dog’s ears. Essential oils are also dangerous because many are toxic to dogs or can cause allergic reactions.
Why Homemade Mixtures Can Worsen Irritation or Infection
Homemade ear cleaners can be too harsh. They might damage the ear lining. If your dog has an infection, these mixtures can trap debris and make things worse.
How to Read Labels When Choosing the Best Dog Ear Cleaning Products
When looking for the best dog ear cleaning products, choose ones with soothing agents like aloe vera or witch hazel. Avoid products with strong fragrances or dyes. Always check with your vet if you’re unsure about a brand or ingredient.
Ingredients That Support Gentle Wax Removal
Look for cleaners with salicylic acid or mild surfactants. These gently remove debris without drying out the ear. Cleaning should be comfortable for your pet, not harsh.
Ingredients to Avoid When the Ear Is Red or Damaged
If your dog’s ear is red, swollen, or has discharge, avoid alcohol or acidic products. They can hurt inflamed skin. Use plain, non-medicated saline or get vet help to fix the problem.
| Substance | Safety Level | Primary Risk |
|---|---|---|
| Rubbing Alcohol | Dangerous | Severe stinging and drying |
| Hydrogen Peroxide | Dangerous | Tissue damage and irritation |
| Vinegar | High Risk | Burning inflamed skin |
| Commercial Cleaner | Safe | None (if used as directed) |
Dog Ear Cleaning Techniques for Different Ear Problems
Every ear issue is unique, so you need different dog ear cleaning techniques. Tailoring your cleaning method to your pet’s needs keeps them clean without stress or irritation.

Removing Light Wax and Dirt From Healthy Ears
For dogs with healthy ears, simple care is enough. Use a soft cloth or a damp cotton pad with a vet-approved solution. This keeps the outer ear clean. Consistency helps stop dirt from getting deeper.
Managing Moisture After Swimming or Bathing
Moisture can lead to bacterial growth in the ear canal. Dry your dog’s outer ear with a clean towel after swimming or bathing. A vet-recommended drying agent can also help dry out trapped water.
Handling Excess Hair Without Pulling or Overplucking
Some dogs have a lot of hair in their ears, which can trap wax and moisture. If you see too much hair, trim it with blunt-nosed scissors. Don’t pull it out to avoid skin damage and infection.
What to Do When Wax Builds Up Repeatedly
If wax keeps coming back, it might mean there’s an underlying problem. This could be due to allergies or chronic irritation. In such cases, see your vet to find out why.
Why Ear Cleaning Alone Cannot Treat Infection or Ear Mites
Cleaning is for maintenance, not treating infections. If your dog has a bad smell, redness, or scratches a lot, cleaning won’t help. Get a vet’s diagnosis to treat ear mites, yeast, or bacteria.
How Often You Should Clean Your Dog’s Ears
Keeping your dog’s ears clean is a delicate balance. It’s not about following a strict schedule. Every dog is different, so what works for one might not work for another. Your goal is to find a consistent care routine that fits your dog’s lifestyle and needs.
Factors That Determine a Safe Cleaning Schedule
Several things can affect how fast debris builds up in your dog’s ears. Knowing these factors helps you figure out the best cleaning schedule for your pet.
Breed, Ear Shape, Coat Type, and Skin Allergies
Dogs with floppy ears, like Basset Hounds or Spaniels, tend to get more moisture and heat. This can cause wax to build up faster. Also, dogs with a lot of hair in their ears might need more cleaning to prevent mats. If your dog has chronic skin allergies, their ears might produce more wax as a reaction to the inflammation.
Swimming, Bathing, Climate, and Outdoor Activity
Active dogs that swim or get bathed a lot are more likely to have moisture issues. Also, humid weather can lead to yeast and bacteria growth in the ears. If your dog spends a lot of time outside in tall grass or dusty areas, check their ears more often for trapped dirt.
How to Create a Weekly Ear-Check Routine
For most dogs, a weekly visual check is key for ear care. Gently lift the ear flap and look for signs of infection, like redness or dark discharge. If the ears look pink and clean, you don’t need to use a cleaning solution.
Why Overcleaning Can Cause Dryness and Irritation
Many people think more cleaning is better. But using too much liquid cleaner can remove the natural oils that protect the ear skin. This can cause unnecessary dryness, itching, and irritation. These problems can actually make the issues you’re trying to fix worse.
When to Change Your Routine After Veterinary Guidance
If your vet finds an issue like an infection or mites, they might suggest a specific cleaning schedule. Always follow their advice, even if it’s different from what you usually do. After the condition clears up, ask your vet how to adjust your routine to prevent it from coming back.
Tips for Cleaning Dog Ears at Home Without Stress
Transform ear cleaning into a calm, bonding experience with the right approach. Using effective tips for cleaning dog ears at home keeps your pet’s hygiene up while they stay relaxed and cooperative.

Build Positive Associations Before the First Cleaning
Start by linking cleaning supplies with treats. When your dog sees the bottle or cotton balls, give them a favorite snack right away.
This simple method creates a positive mental link between cleaning and rewards. Never rush this phase, as building trust is the foundation of a successful routine.
Use a Step-by-Step Desensitization Approach
Before using a liquid cleaner, spend days just touching your dog’s ears. Gently lift the flap and massage the base while giving verbal praise.
If your dog pulls away, stop and try again later with more treats. Gradual exposure ensures your pet stays calm when you introduce the cleaning solution.
Keep the Session Short and Organize Supplies in Advance
Efficiency is key with a wiggly pet. Gather your cotton pads, cleaning solution, and treats on a tray before bringing your dog into the room.
Keep the cleaning process under five minutes to prevent frustration. Short, successful sessions are better than one long, stressful attempt.
Safely Restrain Your Dog Without Pinning or Scolding
Avoid pinning your dog to the floor or using harsh tones, as this creates fear. Instead, use a gentle hold or have a partner offer a lick mat to keep them occupied.
“Patience is the most important tool in your grooming kit; a calm owner leads to a calm dog.”
Track Odor, Wax, Redness, and Your Dog’s Reactions
Consistent monitoring allows you to catch potential issues before they become serious. Use the following table to keep a record of your observations during each session.
| Observation Category | Normal Status | Warning Sign |
|---|---|---|
| Ear Odor | Mild, earthy scent | Strong, yeasty, or foul smell |
| Wax Color | Light tan or yellow | Dark brown, black, or crusty |
| Skin Condition | Pink and smooth | Red, inflamed, or swollen |
| Behavior | Calm and relaxed | Head shaking or pawing |
By following these tips for cleaning dog ears at home, you provide better care for your companion. Always share your tracked observations with your veterinarian if you notice persistent changes in your dog’s ear health.
When Professional Dog Ear Cleaning Is the Safer Choice
Keeping your pet clean at home is important. But, there are times when you need a vet’s help. Knowing when to get professional dog ear cleaning is key for pet owners.
Situations That Require a Veterinary Examination
See a vet right away if your dog shows severe pain or keeps shaking its head. A bad smell from the ear is also a warning sign. These signs mean your dog needs medical help.
Look for swelling, thick discharge, or redness in the ear. If your dog has trouble balancing or tilts its head, it might have an inner ear problem. In these cases, professional dog ear cleaning is the best way to avoid harm.
How Veterinarians Diagnose the Cause of Ear Problems
Vets use special tools to check the ear canal. This helps find the real cause of the problem. Knowing the cause is the first step to fixing it.
Ear Cytology, Mite Checks, and Evaluation of the Eardrum
Ear cytology is a common test. It lets the vet see ear debris under a microscope. They also check the eardrum to make sure it’s okay, as some cleaners can hurt it.
Prescription Treatment for Bacterial, Yeast, or Inflammatory Conditions
After finding the problem, the vet will give you medicine. This might be antibiotic drops, antifungal creams, or anti-inflammatory treatments. It’s important to follow these instructions carefully to help your dog feel better.
What to Expect From Professional Dog Ear Cleaning
At a vet visit, they might use special tools to clean the ear. Sometimes, they use sedation if the dog is too sore. This way, they can clean the ear safely without hurting it.
How to Continue At-Home Maintenance After Treatment
After the problem is gone, the vet will give you a plan for keeping your dog’s ears clean. This plan helps prevent future problems. Sticking to it is important for your dog’s long-term health.
| Condition | Professional Action | At-Home Role |
|---|---|---|
| Bacterial Infection | Prescription Antibiotics | Monitor for recurrence |
| Yeast Overgrowth | Antifungal Treatment | Keep ears dry |
| Ear Mites | Parasiticide Application | Clean bedding regularly |
| Severe Inflammation | Steroid Therapy | Follow gentle cleaning schedule |
Conclusion
Keeping your dog’s ears clean is key to their comfort. It’s all about gentle checks, using the right products, and keeping things dry.
Only clean what you can see. Don’t use harsh cleaners that can hurt your dog. Stop right away if your dog seems uncomfortable.
Look out for bad smells, redness, or discharge. Also, watch for signs like scratching, tilting their head, or trouble balancing. These are signs they need a vet.
Regular care keeps your dog comfortable and happy. Share your ear care tips to help others. Your efforts keep your dog healthy for many years.