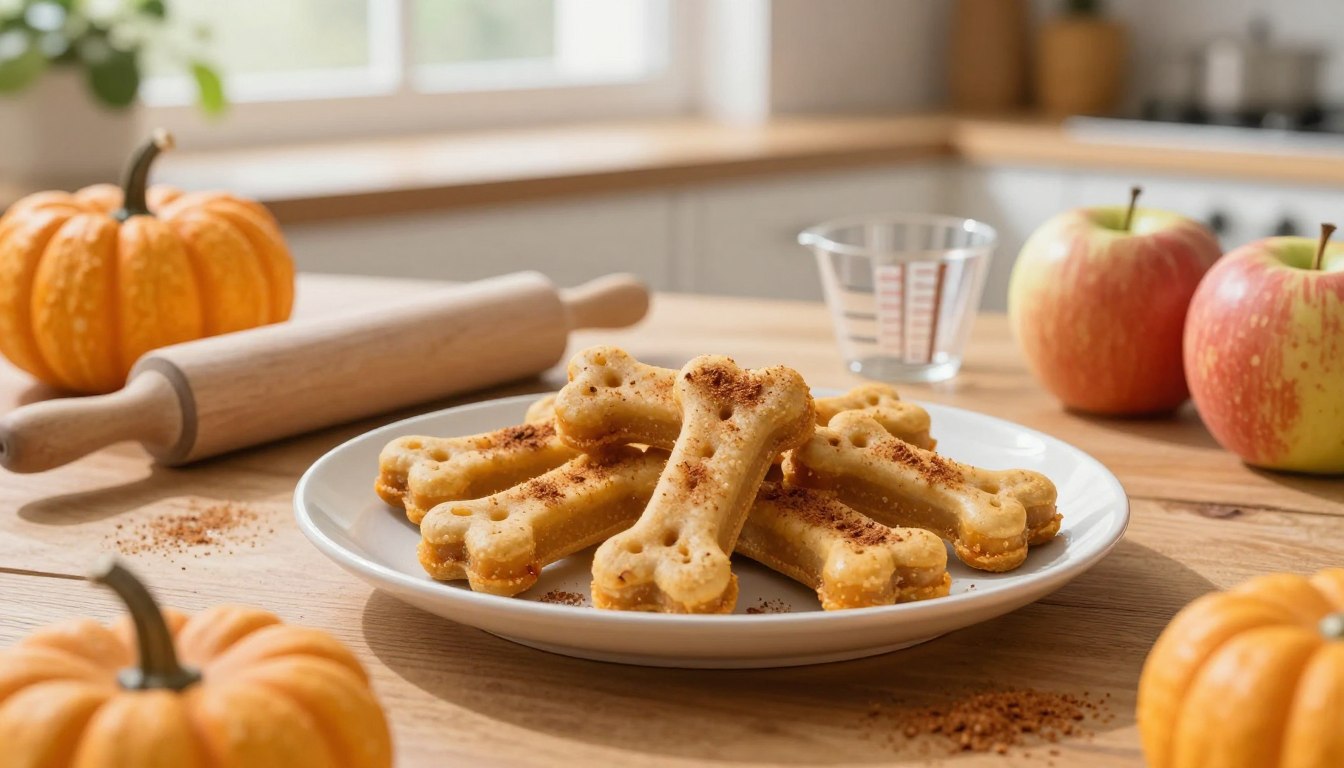
Pumpkin Applesauce Dog Treats: Easy Homemade Recipe for Dogs
Crisp autumn air invites you into the kitchen with your furry best friend. Sharing a wholesome snack creates a special bond that warms the heart during chilly afternoons.
If you want simple ways to spoil your pet, these pumpkin applesauce dog treats offer a perfect solution. They use basic pantry staples and provide a tasty reward alongside a balanced diet.
We will guide you through choosing the right ingredients and mastering the baking process. You will learn to store these fall dog treats safely and serve proper portions to your canine companion.
Table of Contents
Why Pumpkin Applesauce Dog Treats Make a Healthy Homemade Snack
Making your own dog treats lets you control what your pet eats. Simple, whole-food ingredients help your furry friend avoid fillers and artificial preservatives in mass-produced snacks. These homemade dog treats reward your pet while supporting overall well-being.
How Pumpkin and Applesauce Support Your Dog’s Diet
Plain pumpkin puree gives dogs useful nutrients. It provides fiber for healthy digestion and helps your dog feel full. Its natural moisture keeps treats soft and tasty for dogs of all ages.
Unsweetened applesauce binds ingredients and adds flavor. Because it has no added sugar or spices, it offers a gentle sweetness dogs enjoy without blood sugar spikes. Together, these two ingredients make healthy dog treats that taste good and offer benefits.
What Makes These Treats Different From Store-Bought Snacks
Home baking shows you every ingredient in the bowl. Commercial snacks may contain hidden additives, excess sodium, or artificial colors with no nutritional value. Making homemade dog treats helps you avoid these unnecessary chemicals.
You also control each treat’s portion. Shape snacks to match your dog’s size and calorie needs. Pre-packaged store bags rarely offer this level of choice.
| Feature | Homemade Treats | Commercial Snacks |
|---|---|---|
| Ingredient Quality | High/Visible | Variable/Hidden |
| Preservatives | None | Common |
| Customization | Full Control | Limited |
| Cost Efficiency | High | Low |
When Homemade Treats Should Complement, Not Replace, Meals
Even the most healthy dog treats should be occasional rewards. They must not replace a complete, balanced meal. Your dog’s main food provides vitamins and minerals needed for daily health.
Use these snacks to bond with your pet or reward good behavior during training. Keeping treats as a supplement helps your dog maintain a balanced diet while enjoying homemade food.
Ingredients for Easy Pumpkin Applesauce Dog Treats
Healthy dog rewards start with basic, natural ingredients. High-quality ingredients help you make easy dog treat recipes that support your pet’s digestion.
Plain Pumpkin Puree for Fiber and Moisture
Plain pumpkin puree offers key nutrition for your dog. Its fiber supports digestion, while moisture helps create the dough.
Choose 100% pure pumpkin, not canned pie filling. Pie filling may contain additives that can harm dogs.
Unsweetened Applesauce Without Added Sugar or Spices
Applesauce binds the dough and adds natural sweetness dogs enjoy. Choose an unsweetened variety to keep your natural dog treats healthy.
Check the label for added sugars, artificial sweeteners, and spices. Simple, fruit-based ingredients are safest for your pet.
Whole-Wheat Flour and Dog-Friendly Ingredient Options
Whole-wheat flour forms the base for most easy dog treat recipes. It gives dough the texture needed for rolling and cutting fun shapes.
If your dog has food sensitivities, try oat flour or coconut flour. These options support different dietary needs while keeping the treat’s structure.
Optional Cinnamon-Free Flavor Additions
Many human recipes use cinnamon, but dogs do not need it. Flavorful snacks can avoid spices that may upset your dog’s stomach.
Safe Additions Such as Rolled Oats or Natural Peanut Butter
Add a few safe items to improve your snacks’ nutrition. Consider these dog-friendly choices:
- Rolled oats for added texture and fiber.
- Natural peanut butter that is strictly free of xylitol.
- Small amounts of plain, unsweetened yogurt.
Ingredients You Should Never Add to Dog Treats
Keep your natural dog treats safe by avoiding toxic ingredients. Never add these items to homemade batches:
- Xylitol (often found in peanut butter).
- Chocolate or cocoa powder.
- Grapes and raisins.
- Onions, garlic, or chives.
- Artificial sweeteners or excessive salt.
How to Choose Safe Ingredients for Homemade Dog Treats
Before preheating, ensure every ingredient in your bowl is safe for your dog. Choosing safe components is the most important step when preparing homemade dog treats. Inspect your pantry to protect your pet from hidden risks.
Reading Pumpkin and Applesauce Labels
When shopping for pumpkin, choose plain pumpkin puree instead of pumpkin pie filling. Pie fillings may contain nutmeg or added sugar, which can upset your dog’s stomach. Also, choose unsweetened applesauce without artificial preservatives or flavorings.
Checking Peanut Butter for Xylitol
If your recipe uses peanut butter, read the ingredient list carefully. Many brands include Xylitol, a sugar substitute that is highly toxic to dogs, even in small amounts. Choose natural peanut butter containing only peanuts or a little salt.
Choosing Organic or Conventional Ingredients
You may wonder whether organic dog treats are safer than treats made with conventional ingredients. Organic produce may have fewer pesticide residues, but this does not guarantee safety. Focus on the ingredient list and avoid harmful additives, regardless of farming method.
Accounting for Food Allergies and Dietary Restrictions
Each dog has unique nutritional needs, so adjust your recipe accordingly. If your pet has a known wheat sensitivity, use oat flour or coconut flour instead. Consult your veterinarian if you are unsure about introducing a new food into your dog’s diet.
| Ingredient Category | Safe Choice | Avoid/Check Label |
|---|---|---|
| Pumpkin | 100% Pure Pumpkin Puree | Pumpkin Pie Filling |
| Applesauce | Unsweetened, No Additives | Sweetened or Spiced |
| Peanut Butter | Natural (Peanuts Only) | Anything with Xylitol |
| Flour | Whole-Wheat or Oat | Flour with Added Leavening |
Kitchen Tools and Preparation Before You Bake
Prepare your kitchen before baking successful diy dog treats. Organize your space and tools to create a calm baking environment. Planning helps you focus on making quality snacks for your furry friend.
Essential Baking Tools for This DIY Dog Treat Recipe
Gather a few basic kitchen staples before you begin. Ready tools prevent scrambling while you mix ingredients.
- Mixing bowls: Large enough to combine your wet and dry ingredients comfortably.
- Measuring cups and spoons: Accuracy is vital for the right dough consistency.
- Rolling pin: Essential for achieving an even thickness across your dough.
- Cookie cutters: Fun shapes make the process more enjoyable for you.
- Baking sheet and parchment paper: These prevent sticking and ensure even heat distribution.
Preparing the Baking Sheet and Work Surface
Before rolling the dough, clear a large, flat area on your counter. Wipe the workspace with a pet-safe cleaner to prevent cross-contamination from other foods. Line the baking sheet with parchment paper; this crucial step speeds cleanup and prevents treats from burning or sticking.
Bringing Ingredients to the Right Temperature
For best results, let your pumpkin puree and applesauce reach room temperature first. Cold ingredients can make dough harder to mix and roll evenly. This extra time gives your diy dog treats the right texture after baking.
Keeping Your Kitchen Clean and Pet-Safe
Baking is fun, but your kitchen can become dangerous for pets. Keep your dog in another room or behind a gate, away from hot surfaces and sharp tools. Store ingredients securely, and clean spills at once to keep the area safe.
| Tool Name | Primary Function | Maintenance Tip |
|---|---|---|
| Mixing Bowl | Combining ingredients | Hand wash with warm soap |
| Rolling Pin | Flattening dough | Dust with flour to prevent sticking |
| Cookie Cutters | Shaping treats | Dry thoroughly to prevent rust |
| Baking Sheet | Even heat distribution | Use parchment paper for easy release |
Mix the Pumpkin Applesauce Dog Treat Dough
The right dough texture helps homemade dog treats bake evenly and stay pleasant for your pet. Mix your pumpkin applesauce dog treats dough with care for a smooth bake.
Combining the Wet Ingredients
Put the pumpkin puree and unsweetened applesauce in a large mixing bowl. Use a sturdy spatula or wooden spoon to blend them into a smooth, uniform base. This mixture adds the moisture and flavor that dogs enjoy.
Adding Flour Gradually for an Even Dough
After mixing the wet ingredients, add your whole-wheat flour one half-cup at a time. Adding flour slowly helps create high-quality pumpkin applesauce dog treats. Stir until each portion blends in before adding the next.
Adjusting the Texture When the Dough Is Too Sticky or Dry
Each dough batch may differ because pumpkin can hold different amounts of moisture. If the dough is sticky, add a small sprinkle of flour. If it is dry or crumbly, add a teaspoon of water or extra applesauce to bind it.
| Dough Condition | Cause | Recommended Fix |
|---|---|---|
| Too Sticky | Excess moisture | Add 1 tbsp flour |
| Too Crumbly | Insufficient liquid | Add 1 tsp water |
| Perfect Texture | Balanced ratio | Ready to roll |
Kneading Without Overworking the Mixture
When dough pulls from the bowl sides, place it on a lightly floured surface. Gently knead it by hand until it forms one cohesive ball. Avoid excessive handling, because overworking can make the dough dense and tough for your dog to chew.
Shape the Treats for Even Baking
Proper shaping helps each piece bake at the same rate. It prevents burnt edges and undercooked centers, while uniform shapes give your pet-friendly treats an even texture.
Rolling the Dough to a Dog-Friendly Thickness
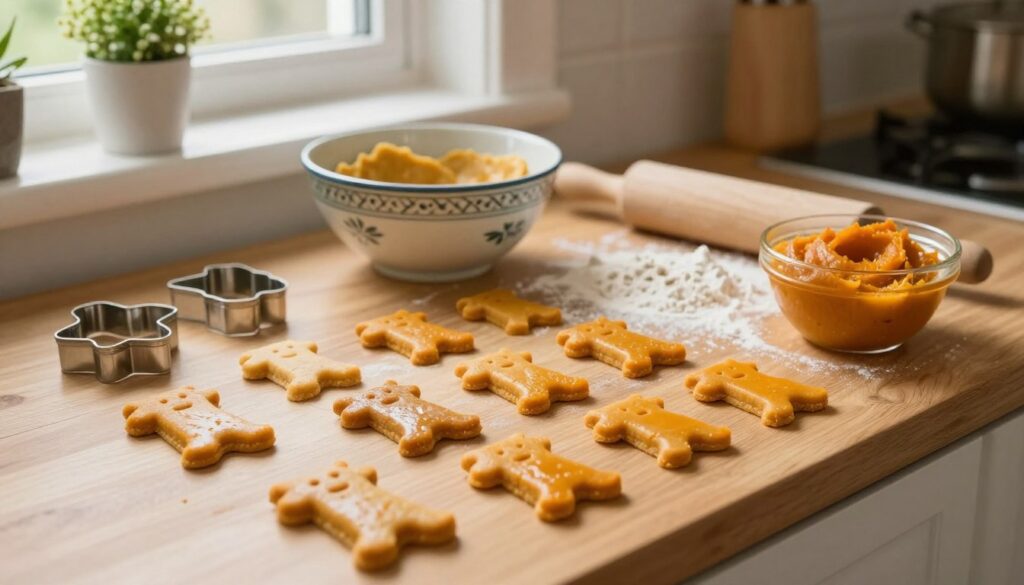
Roll your dough to a consistent thickness between one-quarter and one-half inch. A rolling pin with guide rings helps create an even surface across the sheet. Consistency is key because thin areas crisp much faster than thick ones, causing uneven results.
Using Bone, Pumpkin, or Round Cookie Cutters
Cookie cutters give your snacks a fun, professional look. Choose classic bone shapes, festive pumpkin outlines, or simple circles, and keep cutters clean and dry. Press firmly into the dough for clean edges that help treats hold their shape while baking.
Making Small Treats for Toy Breeds
If you have a smaller dog, use miniature cookie cutters for properly sized portions. Smaller pet-friendly treats are also ideal for training sessions because you can reward your dog often without overfeeding. These bite-size rewards keep your pup motivated and help manage daily caloric intake.
Creating Bite-Size Pieces Without Cookie Cutters
You do not need special equipment to make high-quality snacks at home. Use a kitchen knife or bench scraper to cut the dough into small, even squares or rectangles. Focus on keeping every piece the same size so your pet-friendly treats bake evenly, whatever their shape.
Bake the Treats Until Firm and Golden
The final step in these easy dog treat recipes is baking them until firm and golden. Good heat control gives your pet a safe snack with the right texture.
Arranging the Cutouts on the Baking Sheet
Place shaped dough pieces on a parchment-lined baking sheet, leaving at least one inch between them. This space lets hot air move around each treat, supporting even browning and steady drying.
Crowded treats may steam instead of becoming crisp. Good airflow creates the satisfying crunch dogs love.
Setting the Oven Temperature for Consistent Results
Preheating your oven helps produce reliable results. Most recipes work best at about 350°F (175°C), a moderate heat that bakes treats through without burning the edges.
Do not open the oven door often during the first half of baking. Steady heat helps the dough rise slightly and set properly.
Recognizing When the Treats Are Fully Baked
Your treats are ready when their surfaces feel firm and dry. The centers should not look wet or soft when pressed gently.
Look for a light golden color around the edges. Avoid excessive browning, which can cause a bitter taste or overly hard texture.
Adjusting Baking Time for Thin and Thick Treats
Dough thickness greatly affects total baking time. Thinly rolled treats finish much faster than thicker, heartier shapes.
Watch the oven closely as the timer nears the end. Using these easy dog treat recipes requires careful visual checks, since a few extra minutes can greatly change your homemade snacks’ quality.
Cool, Dry, and Store the Finished Dog Treats
Proper post-baking care keeps your homemade dog treats safe and delicious for your pet. Handle treats correctly after baking to prevent spoilage and preserve the texture your dog loves.
Cooling Treats Completely Before Serving
Transfer snacks to a wire cooling rack immediately after baking. Leaving them on the hot baking sheet lets residual heat cook the bottoms and cause burnt edges.
Air must circulate beneath treats as they cool. Pack them only when fully cool. Warm treats create condensation inside containers, which can cause mold growth.
Drying the Treats for a Longer Shelf Life
For a crunchier texture, leave treats in the oven after turning it off. Crack the oven door and let them sit for an hour or two.
This process removes extra moisture, the main enemy of homemade dog treats. Drier treats spoil less easily, so you can keep them in the pantry longer.
Storing Treats at Room Temperature or in the Refrigerator
Once treats are completely cool, place them in an airtight container or sealed plastic bag. Store soft-baked treats in the refrigerator to keep them fresh and prevent bacterial growth.
If treats are very dry and crisp, a cool, dark cupboard works well. Check for moisture or off-odors before offering a snack to your dog.
Freezing Extra Treats for Future Use
If you made a large batch, freezing preserves treats for months. Place them in a freezer-safe bag, removing as much air as possible to prevent freezer burn.
When ready to use treats, take out a small handful and let them thaw at room temperature. This keeps your homemade dog treats as fresh as the day they were baked.
| Storage Method | Ideal Environment | Estimated Shelf Life |
|---|---|---|
| Airtight Container | Cool, Dry Pantry | 1 to 2 Weeks |
| Refrigerator | Sealed Bag | 3 to 4 Weeks |
| Freezer | Airtight Freezer Bag | Up to 3 Months |
Serve Pumpkin Applesauce Treats Safely
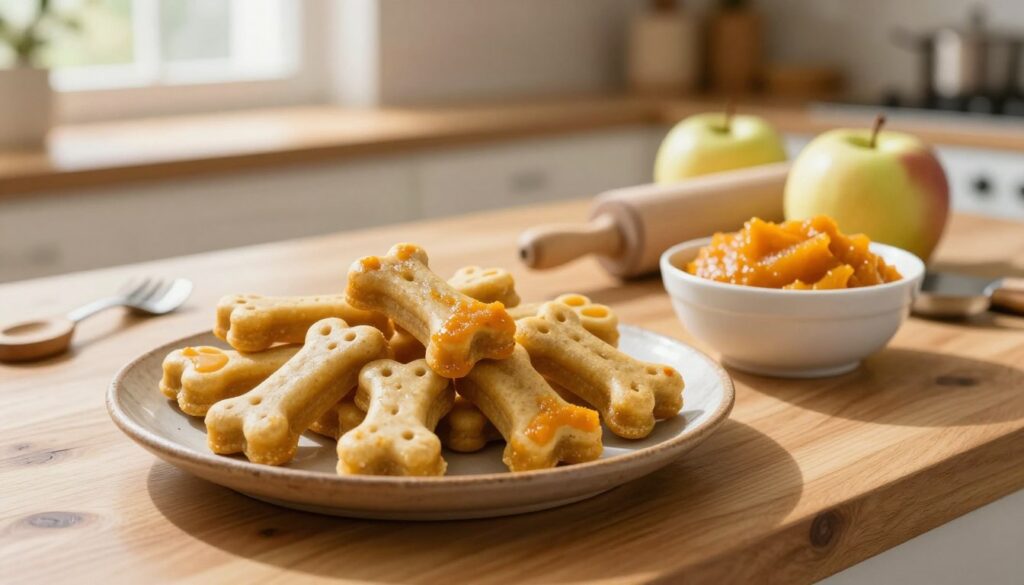
When you share pumpkin applesauce dog treats with your furry friend, safety comes first. Even the most healthy dog treats can upset your dog’s stomach when fed too quickly or in excess. A careful plan helps your pet enjoy these snacks without negative side effects.
Choosing an Appropriate Treat Portion
The treat size should match your dog’s size. Large breeds can handle bigger pieces, but small breeds and puppies need tiny portions to prevent choking. Break larger snacks into smaller pieces if you are unsure how your dog chews.
Introducing New Ingredients Gradually
If your dog has never eaten pumpkin, applesauce, or wheat, start with a very small amount. Monitor your pet for 24 hours to ensure the new ingredients cause no stomach problems. This slow start matters, especially with peanut butter; confirm it is free of xylitol.
Using Treats During Training and Enrichment
These snacks work well as positive reinforcement during training. Their appealing taste makes them strong motivators for learning new commands. You can hide them in puzzle toys to provide mental enrichment and keep your dog engaged.
Keeping Treat Calories Within Your Dog’s Daily Allowance
Veterinarians generally recommend keeping treats below 10% of your dog’s daily calories. If you give several treats, reduce the portions of your dog’s main meals. This balance helps prevent weight gain while allowing rewarding snacks.
| Dog Size | Daily Treat Limit | Recommended Portion |
|---|---|---|
| Small (10-20 lbs) | 1-2 small treats | Quarter-sized pieces |
| Medium (21-50 lbs) | 2-3 small treats | Half-sized pieces |
| Large (51+ lbs) | 3-5 small treats | Full-sized pieces |
Signs Your Dog May Not Tolerate an Ingredient
Watch your dog for signs of food intolerance after they eat healthy dog treats. Common symptoms include vomiting, diarrhea, excessive itching, or facial swelling. If you notice these reactions, stop feeding the treats and observe your pet.
When to Contact Your Veterinarian
Contact your veterinarian if symptoms are severe, last a long time, or your dog seems lethargic. Seek professional help if your pet has trouble breathing or shows an allergic reaction. Always keep your vet’s contact information handy when adding new pumpkin applesauce dog treats to your pet’s diet.
Adapt the Recipe for Different Dogs and Dietary Needs
Every dog has unique nutrition needs, so adjust your baking routine with care. These changes help create natural dog treats for your pet’s health and life stage.
Making Softer Treats for Senior Dogs
Senior dogs may have dental problems that make hard, crunchy snacks difficult to chew. Add more pumpkin puree or applesauce to make the dough softer. Reducing the baking time by a few minutes keeps the center moist and tender.
Preparing Smaller Portions for Puppies and Small Breeds
Tiny mouths need smaller bites to prevent choking and support proper digestion. Roll the dough thinner, then cut it into tiny squares or circles. This change controls calories and keeps your puppy happy during training.
Adjusting Ingredients for Wheat-Sensitive Dogs
For a dog with wheat sensitivity, replace traditional flour with oat flour or coconut flour. Always consult your veterinarian before major diet changes. Many owners use organic dog treats as a base to avoid pesticides or additives in conventional grains.
Reducing Fat for Dogs With Weight-Management Needs
A healthy weight supports your dog’s long-term wellness. Use pure pumpkin and applesauce without extra oils or nut butters to reduce calories. These organic dog treats stay flavorful and satisfying without causing unwanted weight gain.
Creating Seasonal Fall Dog Treat Variations Safely
Celebrate the changing seasons with safe, festive ingredients. For fall dog treats, add a tiny pinch of ginger or nutmeg, but always verify that your spices are non-toxic to dogs. These treats add flavor but should not replace a balanced diet.
| Dog Need | Adjustment Strategy | Benefit |
|---|---|---|
| Senior | Increase moisture/lower bake time | Easier to chew |
| Puppy | Smaller cut sizes | Prevents choking |
| Wheat-Sensitive | Use oat or coconut flour | Reduces inflammation |
| Weight Control | Remove added fats | Lower calorie count |
Troubleshoot Common Homemade Dog Treat Problems
Learning to solve baking mishaps is part of mastering homemade dog snacks. Even with a careful recipe, conditions and ingredient changes can affect your diy dog treats. Patience and close attention help you improve your technique over time.
Fixing Dough That Crumbles During Rolling
If dough falls apart during rolling, it probably needs more moisture. Add one teaspoon of water or extra pumpkin puree at a time until it holds together. Avoid adding too much liquid at once, as this can make the dough sticky and difficult to handle.
Preventing Treats From Spreading in the Oven
Treats often lose shape when dough is too warm or the oven is too cool. Chill the dough before rolling, and make sure the oven reaches the correct temperature. Keep your pet-friendly treats at a consistent thickness to help them hold their shape while baking.
Improving Treats That Turn Out Too Hard
Over-baking or rolling dough too thin usually makes treats hard. If your dog likes a softer snack, bake them a few minutes less or make thicker cutouts. Store finished treats with a slice of apple in an airtight container to soften them slightly through moisture absorption.
Handling Uneven Baking or Browning
Uneven browning often happens when treats of different sizes share a baking sheet. Small pieces cook faster than large ones, which can burn their edges. Group similar-sized treats together on the tray so they reach a golden-brown finish at the same time.
Quality control in the kitchen is the secret ingredient to keeping your pet happy and healthy with every homemade bite.
Knowing When to Discard Spoiled Treats
Safety comes first when you feed your dog. Discard the entire batch if you see mold, smell an unusual or sour odor, or notice a slimy texture. Never try to save spoiled treats, because they can cause digestive upset.
| Problem | Primary Cause | Recommended Solution |
|---|---|---|
| Crumbly Dough | Low moisture | Add water/puree |
| Spreading | Warm dough | Chill before rolling |
| Excessive Hardness | Over-baking | Reduce oven time |
| Uneven Browning | Mixed sizes | Use uniform shapes |
Conclusion
Making pumpkin applesauce dog treats at home lets you control every ingredient used in your kitchen. Choose plain pumpkin puree and unsweetened applesauce for wholesome fiber and natural flavor. Check labels to keep flour and other additives safe for dogs.
These healthy dog treats reward your companion during training or quiet afternoons. Let each batch cool completely before serving for safety. Keep portions small because these snacks should supplement, not replace, regular meals.
You can adjust textures, sizes, and ingredients for your dog’s specific age or health requirements. Ask your veterinarian about dietary restrictions or allergies. Your commitment to quality baking helps your pet enjoy a delicious, safe, and rewarding experience with every bite.